TinyCP – A Lightweight Control Panel for Managing Linux Systems
TinyCP is a lightweight control panel, that provides wide range of features on a Linux system, which features includes:
- Domain Management
- Mailboxes
- Databases
- FTP
- Samba
- Firewall
- VPN
- GIT
- SVN
At this point TinyCP is only available for Debian/Ubuntu based systems, but it is supposed to come for CentOSin the near future.
Before you start with the installation, the TinyCP team requires you to register with an email address in order to get the download instructions and account ID.
These details will later be required to activate your license. The download page can be found here. The process is straightforward and completed in less than a minute.
Note: In a recent post from TinyCP team, it was made known that TinyCP will remain free until the beginning of 2019. After that, in order to keep the project alive, small fees will be charged on per IP bases. Per the information in that post, the prices will be $1 Montly and $10 Annually.
For the purpose of this article, I will be installing TinyCP on a Linode Ubuntu 16.04 VPS with IP address 10.0.2.15.
Install TinyCP Control Panel in Debian and Ubuntu
To install TinyCP you will need to download their installer. For that purpose, you can navigate to a directory of your choice and run the commands below. For organization purposes, I will download the package in: /usr/local/src/.
Give executable permissions on the downloaded file and run it.
The installation process is pretty quick (less than 2 minutes). When the installation is complete, you will receive a URL username and password with which you will be able to access your new control panel:
Note: Before trying to access the provided URL, you will need to start TinyCP with the following command.
Then you can head to the provided URL and authenticate with the new credentials. The page should look like this:

TinyCP Admin Login
Once logged in your account, fill the email address and account ID so your license key can be updated:
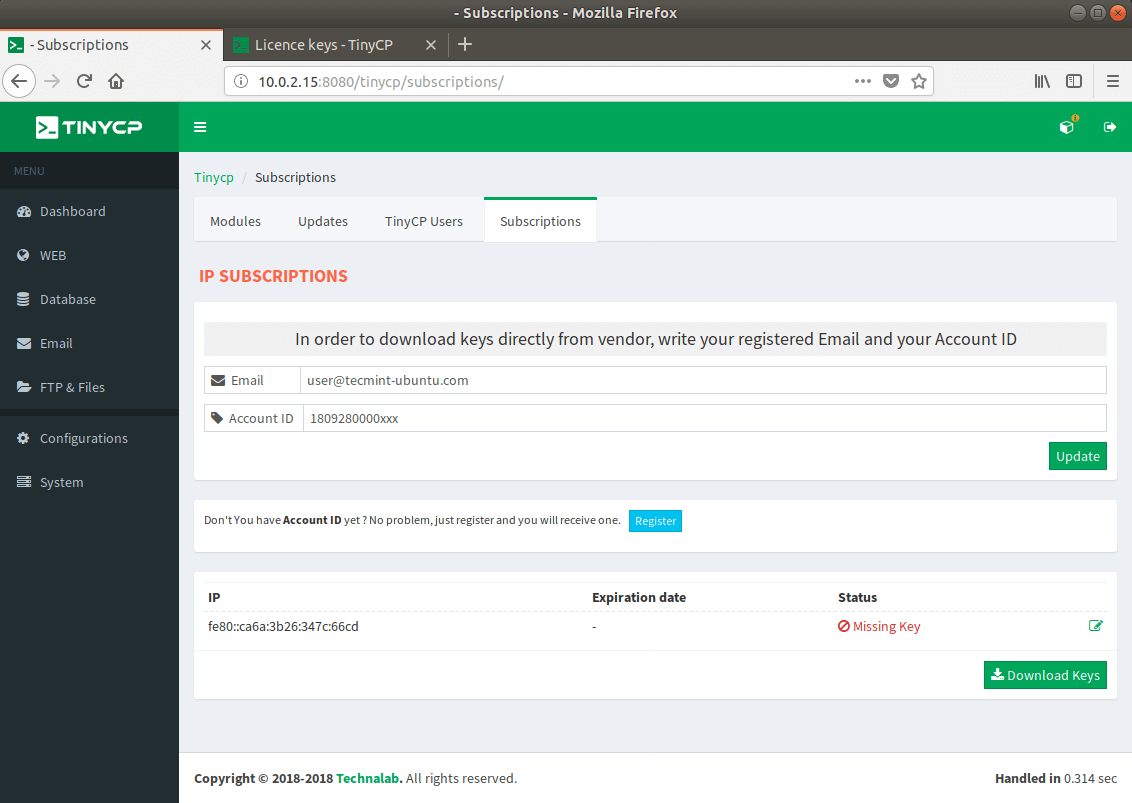
Active TinyCP Subscription
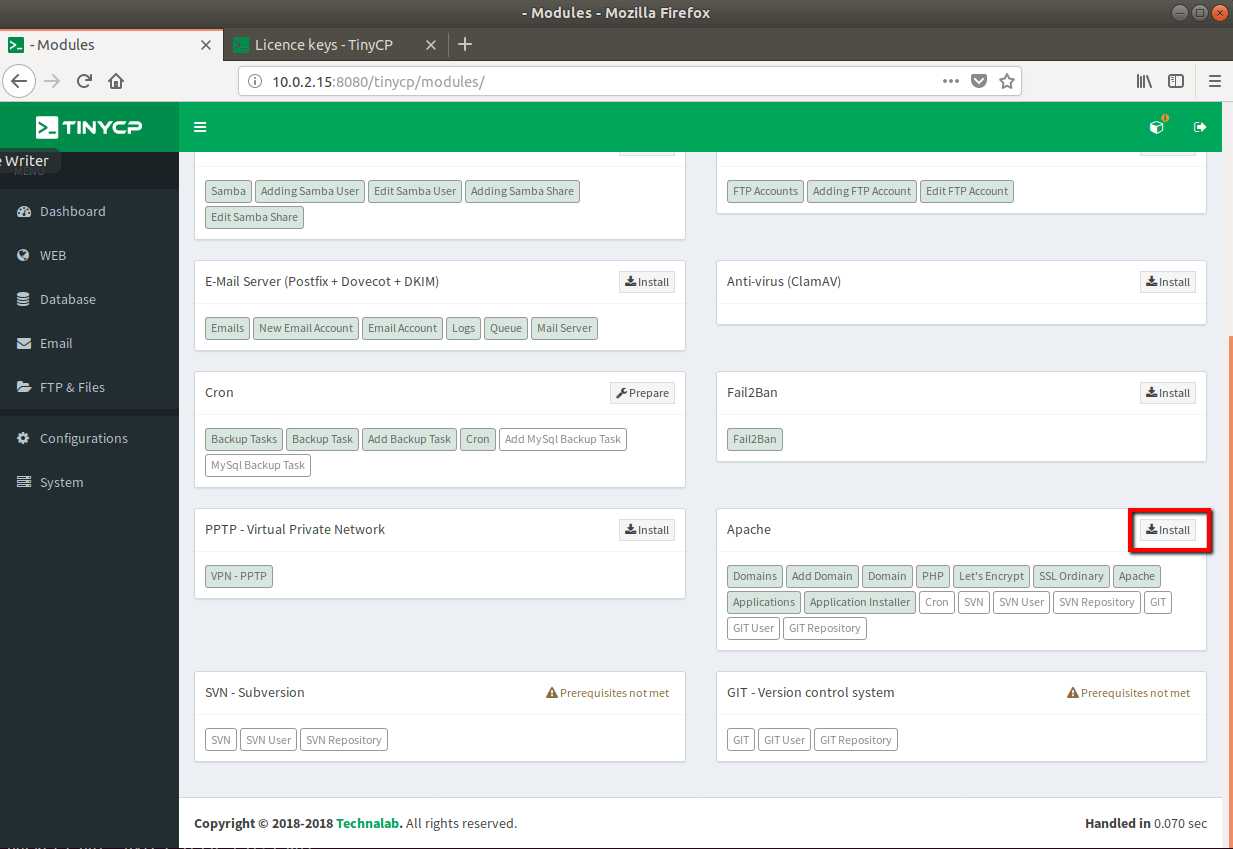
Then you can proceed to the modules section, where you will be able to install different “modules”, including MySQL, PostgreSQL, Samba, FTP server, Email server, ClamAV, Cron, Apache web server. The modules page is also accessible through the cube in the upper right corner:
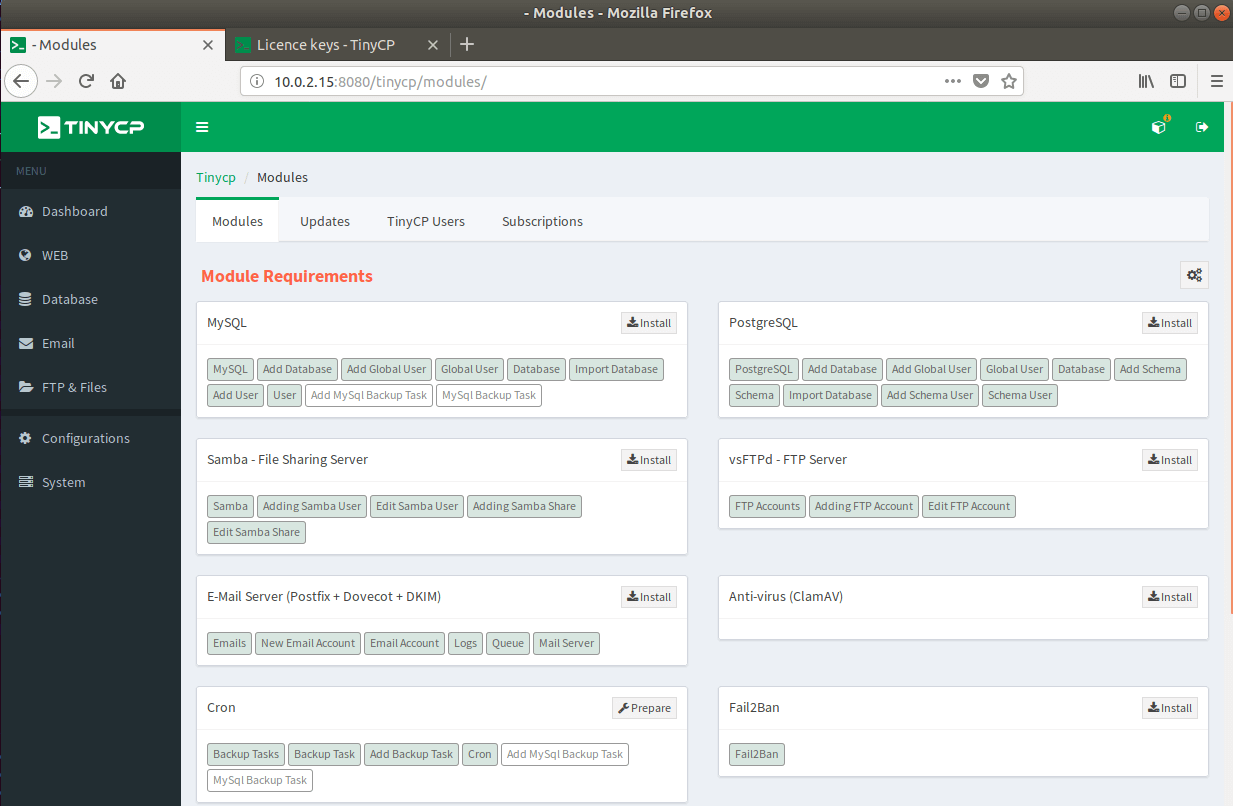
TinyCP Install Modules
Install MySQL/MariaDB
Let’s start by installing a MySQL service. Simply click the “install” button next to MySQL. A popup will show, asking you to confirm the installation of MySQL. Click install:
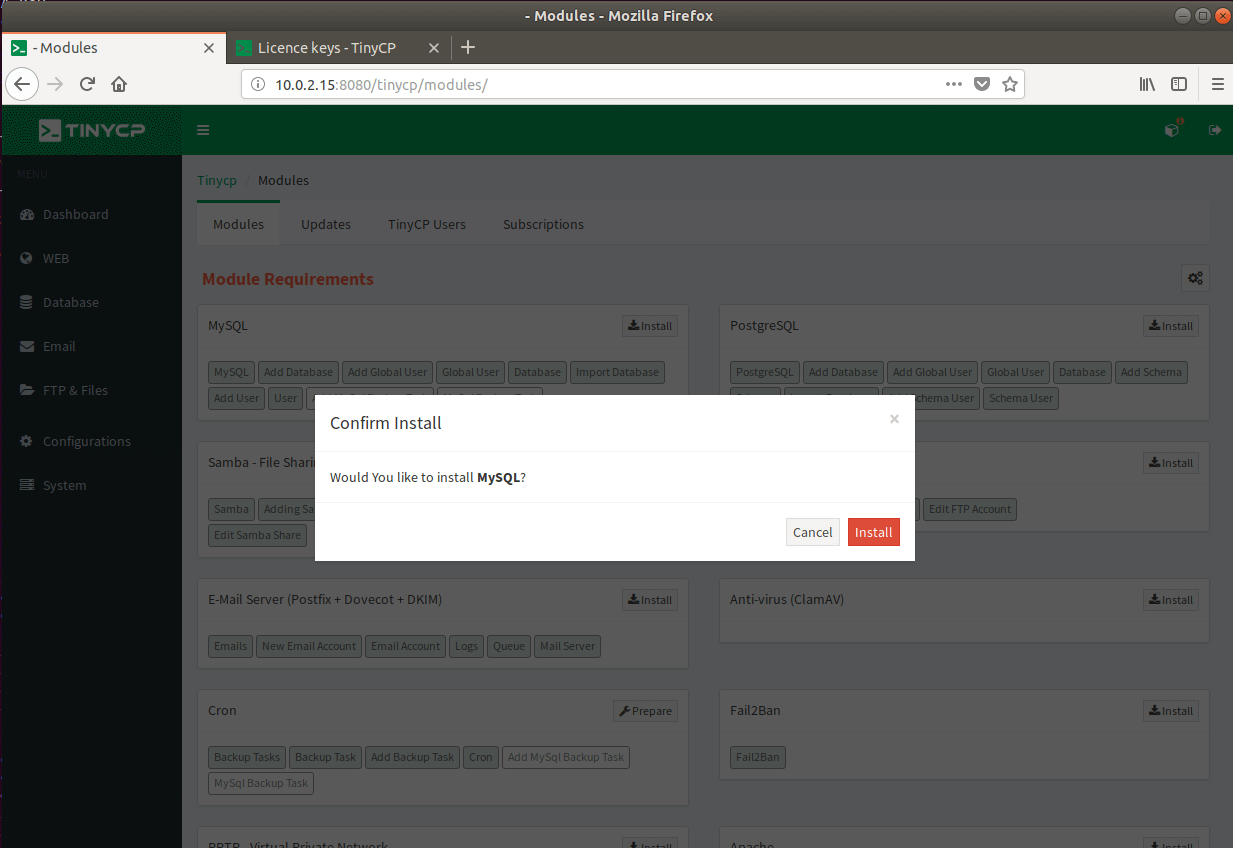
Install MySQL Module
You will need to wait a minute or two for the installation to complete. In the end you should see output similar to this one:
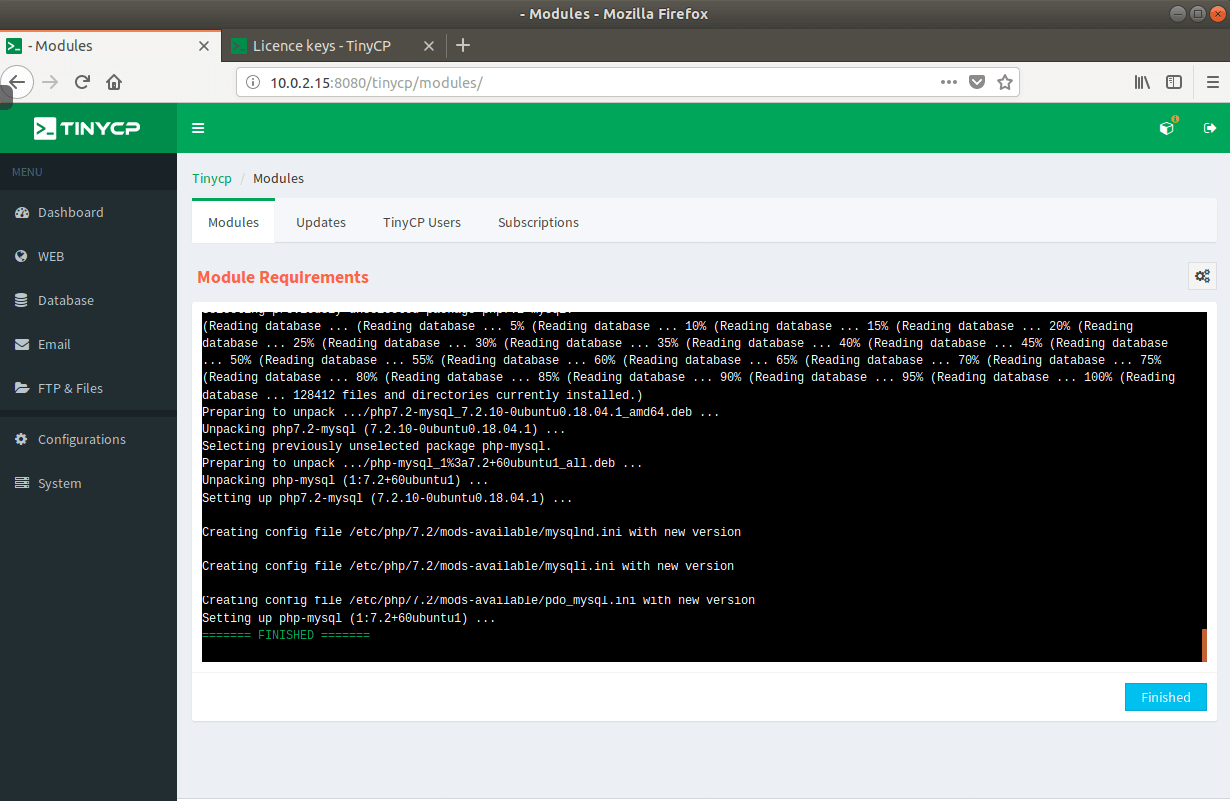
MySQL Module Installation
Click the “Finished” button and then click on the “Prepare” button next to MySQL. This will create the required config files for the service. Databases can be managed from the left side menu. The database section allows you to:
- Add/delete databases
- Create users
- Create backups tasks
Each process is pretty straightforward and does not require any additional explanation.
Install Apache Web Server
Now lets Install Apache web server as well. Apache can be found at the bottom of the page. Again simply click the install button and wait few minutes for the installation to complete:
Install Apache Web Server
When the install is complete, click on “Finished” button again and then “Prepare” to generate the required config files:

Prepare Apache Configuration
If you wish to tweak your services a little more, you can go in the “Configuration section on the left, choose the service you wish to tweak and make your changes.
For example, you can install additional Apache modules using a drop down menu on the right and by clicking the install button:
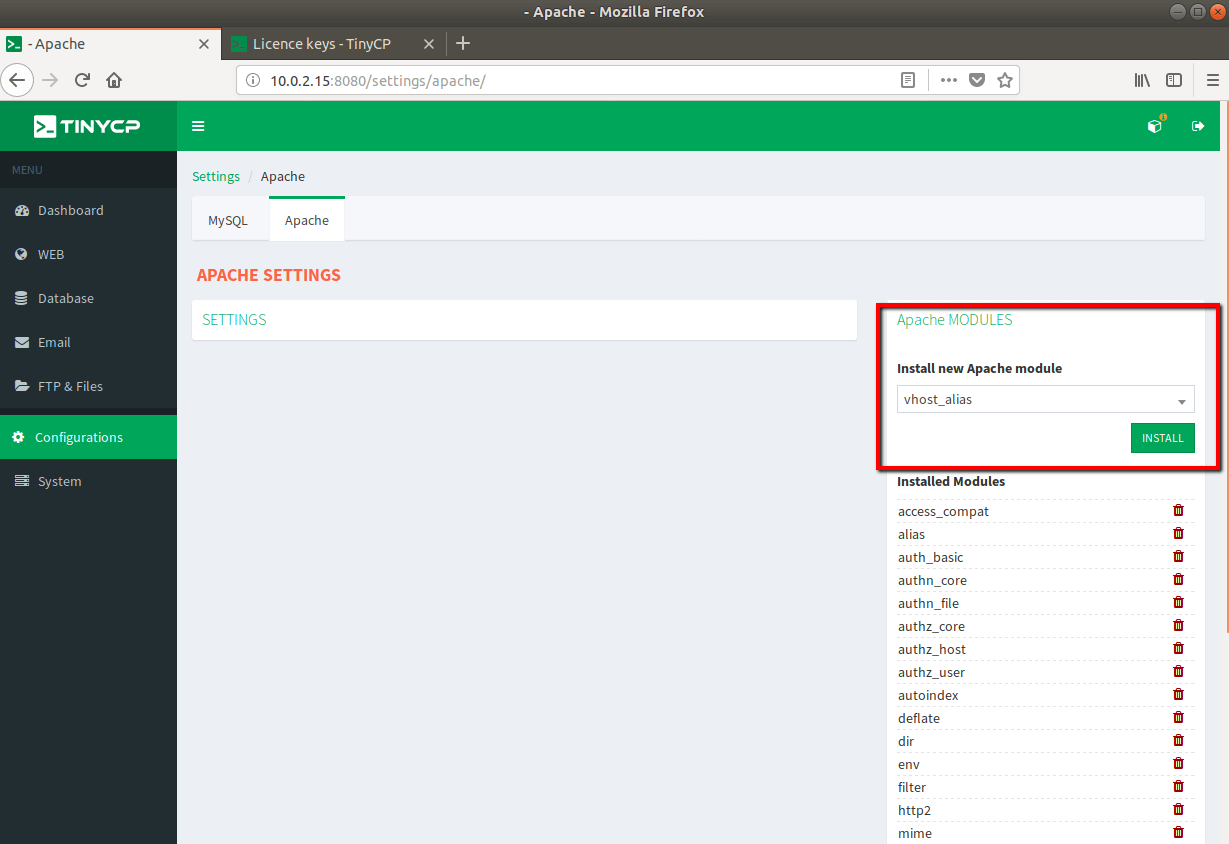
Tweak Apache Settings
Create Your First Domain
Now you can create your first domain, by using the “WEB” section in the left navigation menu. Click on “New Domain” and fill in the domain you wish to host. You can choose the domain’s IP address from the dropdown menu:
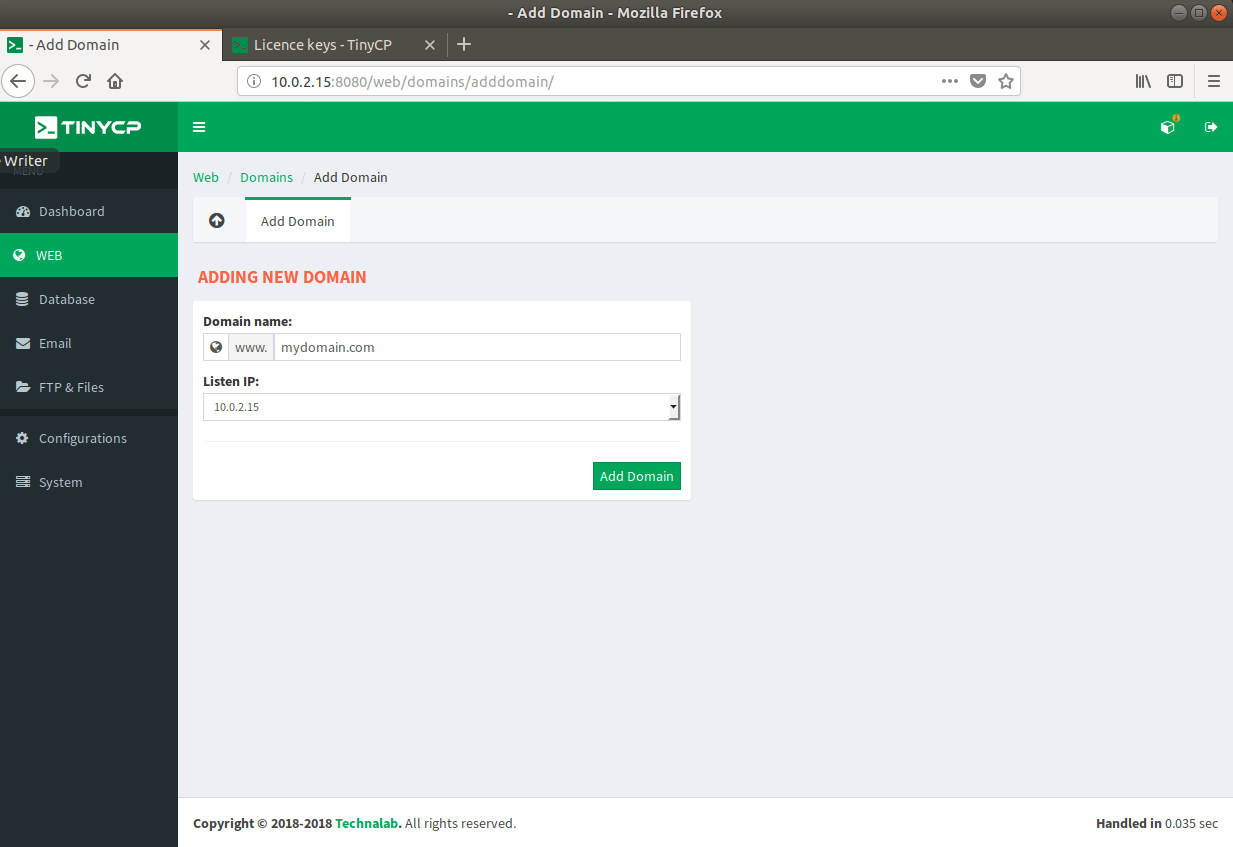
Create New Domain
Once created, you will be redirected to the domain’s configuration page. Here you will see few sections, including:
- Main section – provides information about domain, document root and allows you to setup www redirect.
- Subdomains – Easily create subdomains.
- Aliases – create domain aliases.
- Listen – list with IP addresses on which IP resolves and allowed ports.
- Apache, error logs, access logs – first tab allows you to see the vhost for your domain, next are the error logs and third are the access logs.

Domain Configuration Page
In the upper side of the window, you may notice that there are two more sections:
- PHP – allows you to configure certain PHP settings, disable functions etc.
- Applications – helps you install applications on your domain, including RoundCube and WordPress.
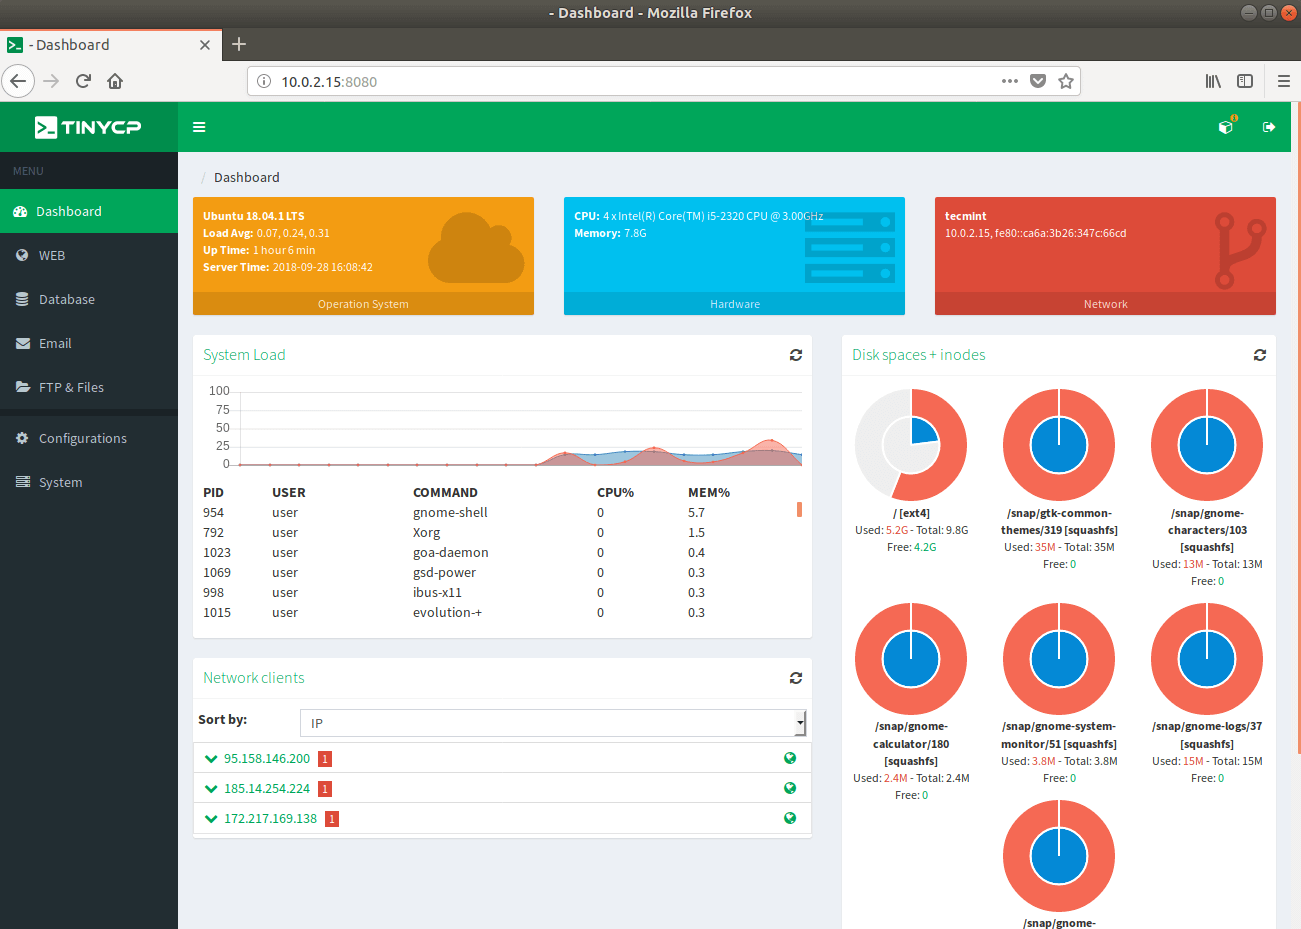
Review the Dashboard
TinyCP dashboard provides you some basic informatoin about the usage on your system. This information includes:
- Operating system info
- Hardware info
- IP address
- System load
- Top processes
- DIsk spaces + inodes
- Network clients
The panel only shows information about your system. No actions can be taken from here (such as killing a process for example).
Review TinyCP Dashboard
Conclusion
TinyCP is a lightweight, feature rich control panel, that allows you to easily create domains, databases, email and FTP accounts etc. The interface is simple and easy to navigate through. If you are short on resources and need a control panel to create and manage your system, this might be the right choice for you.
https://www.tecmint.com/tinycp-lightweight-control-panel-for-linux/

Comments
Post a Comment